
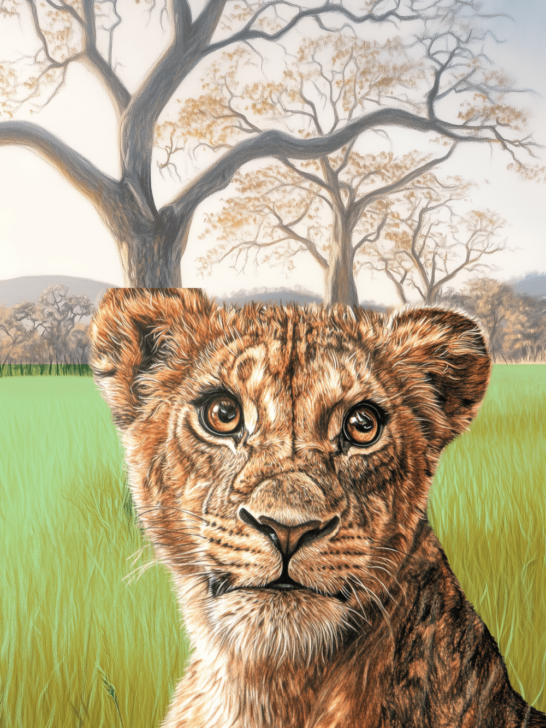

So, you want to draw fur? Great choice! Fur is fluffy, fabulous, and slightly frustrating—but don’t worry, I’ve got you covered.
If you’ve ever attempted to draw an animal, you might have noticed that fur is NOT just a bunch of random scribbles. Nope, fur has layers, texture, and movement—just like real hair (and, unfortunately, real life).
But guess what? With the right technique, drawing fur can be easy and fun! By the end of this tutorial, you’ll be creating fur so realistic that people might try to pet your artwork.
Related: Drawing Animals
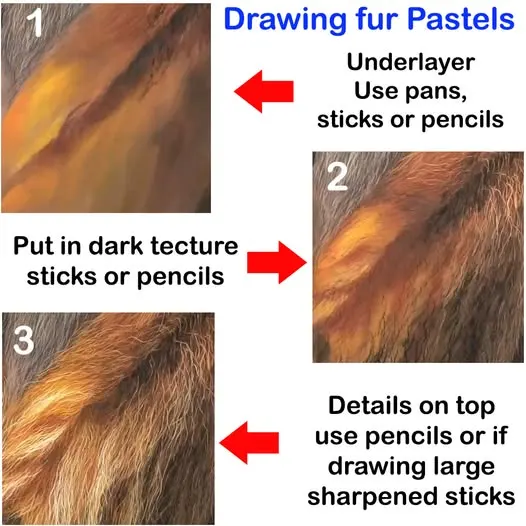
Step 1: Start with an Underlayer (a.k.a. the Foundation of Great Fur)
Before we dive into the details, we need to lay down a solid base. Think of this as applying foundation before putting on makeup. You wouldn’t start with eyeliner, would you? (Okay, maybe some of you would, but trust me on this one).

What to use:
- Pan pastels
- Soft pastels
- Colored pencils
- Pastel sticks
You might be thinking: “Wait, I thought we were drawing fur. Why are we making a blurry background?” Because fur isn’t drawn hair by hair—it’s built up in layers!
How to do it:
- Choose the base color of your animal. Is it a golden retriever? Start with warm yellows and browns. A black cat? Try dark blues and deep purples for richness.
- Apply the underlayer smoothly, blending softly to avoid harsh strokes.
- Keep this layer slightly blurry—no sharp details yet!
Think of this step like setting the stage for a play. The actors (aka the fur details) will come later!
What NOT to do:
Don’t just start drawing individual fur strands right away! That’s like trying to frost a cake before baking it. You need a smooth foundation first.
Step 2: Add the Darker Textures Next
Once your underlayer is ready, it’s time to start adding texture and depth. This is where the fur begins to actually look… furry.

How to do it:
- Use darker pencils or pastels to add shadowed areas.
- Don’t just scribble randomly! Fur flows in a certain direction.
- Break it into clumps rather than drawing every individual strand. Fur sticks together in some places!
- Work slowly and softly, building up your layers instead of pressing too hard.
Example:
If you’re drawing a tiger, the dark stripes should be bold and sharp, while the surrounding fur should blend softly into them to create realism.
Pro Tip:
- If you’re working with pastels, use black gouache paint for details like spots and stripes so they won’t smudge when adding more layers.
- Always work from dark to light—that’s the secret to realistic fur!
Step 3: Add the Lightest Details (Now It’s Really Coming to Life!)
Now, this is where the magic happens! The final layer of fur is what makes it pop and look soft, fluffy, or sleek—depending on your subject.

How to do it:
- Use a lighter pastel pencil or colored pencil to draw fine fur strands.
- Follow the natural flow of the fur.
- Vary the pressure—some areas should be sharp and defined, while others should remain soft and blended.
Think of this step as adding highlights to hair—it brings life and movement to your drawing.
Common Mistake Alert:
Beginners often use just one highlight color for fur. Nope! Use a mix of:
- Cream
- Beige
- Pale blues (for white fur)
- Soft yellows or warm pinks (for golden fur)
More colors = more realism. Trust me!
Bonus: Special Techniques for Different Types of Fur
Not all fur is the same! Here’s how to handle different fur patterns and textures.
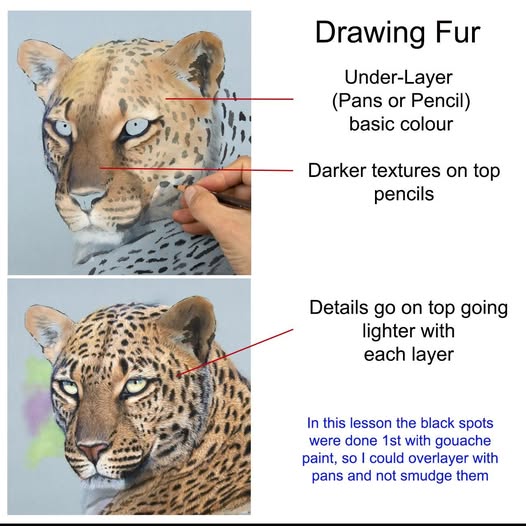
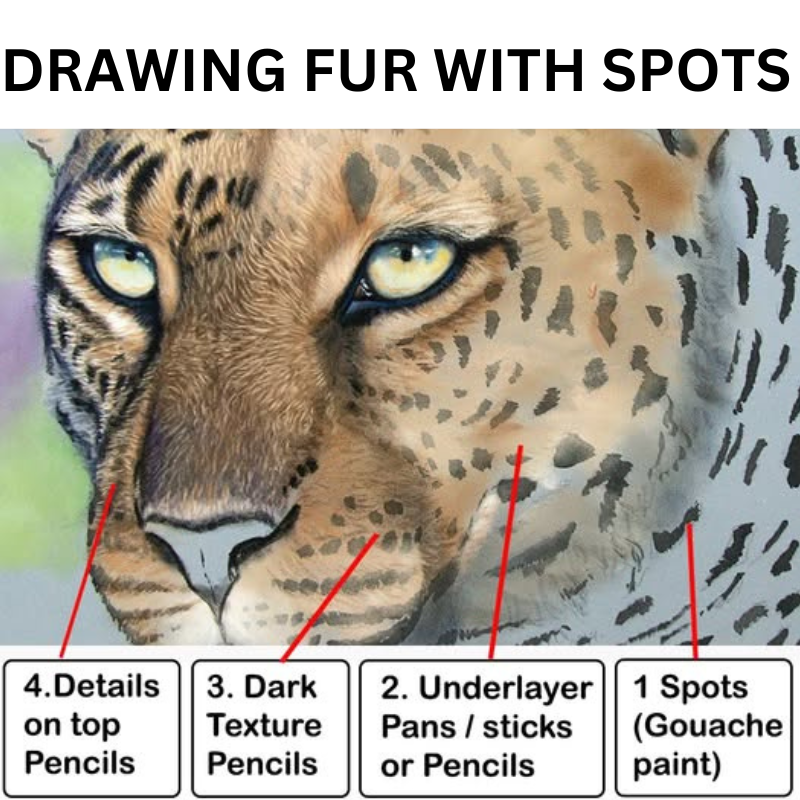
For Spotted Fur (like Cheetahs & Leopards)
- Paint the spots first using gouache or pastel pencils.
- Add the base color around the spots.
- Layer the fur over the spots so they don’t look like stickers on a flat surface.

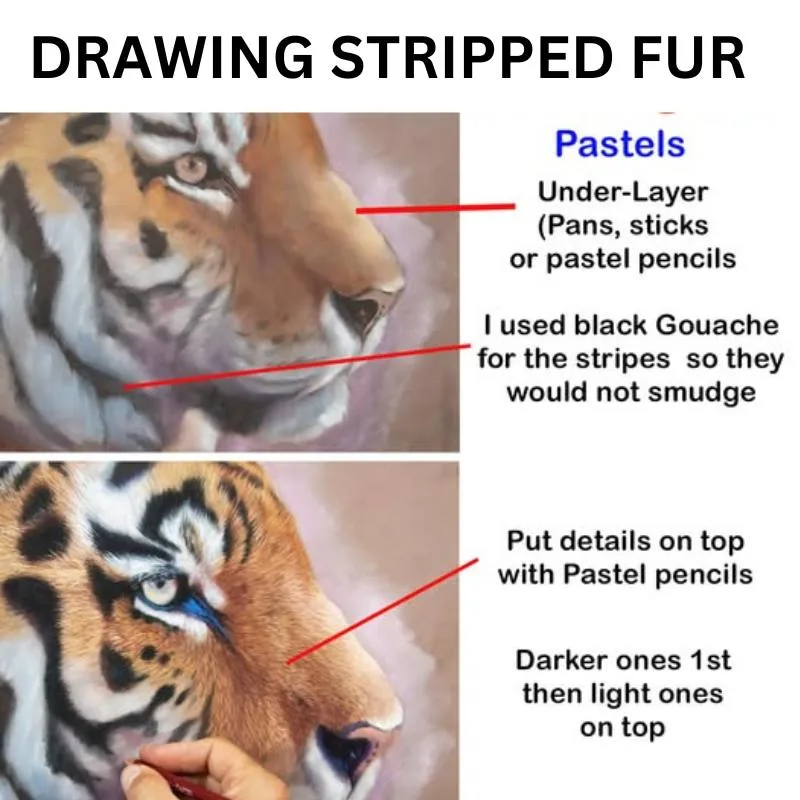
For Striped Fur (like Tigers & Zebras)
- Use gouache or pastel pencils for the stripes before adding texture, so they don’t smudge into the lighter fur.
- Add fur detail over the stripes to blend them naturally.

For Soft, Fluffy Fur (like Dogs & Bunnies)
- Keep strokes light and feathery—no harsh lines!
- Use soft blending techniques (finger smudging works well).
- Layer, layer, layer! More layers = softer fur.
Final Touches: The Secret Sauce to Make Your Fur Look Real
Alright, you’ve got the basics down. Now let’s take it to the next level with some pro secrets.
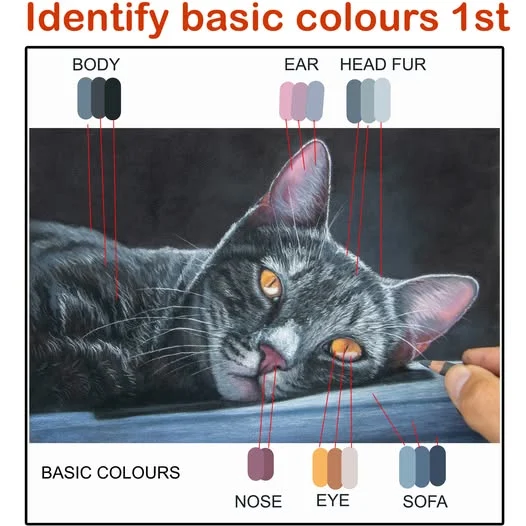
Identify Key Colors
Not all fur is what it seems!
- A black dog? Its fur is probably actually blue, purple, and gray.
- A white cat? You might need pale blue, cream, and lavender for depth.
- A golden retriever? Use yellows, browns, and even soft reds for warmth.
Use Contrast for a 3D Look
Real fur isn’t flat—it has depth! Darken your shadows and lighten your highlights. This creates the illusion of soft, touchable fur.
Don’t Over-Blend!
One of the biggest mistakes beginners make?
Over-blending. If you blend too much, your fur will look like smooth plastic instead of fluffy and textured. Keep some sharp strands to maintain realism.
Troubleshooting: Why Doesn’t My Fur Look Real?
If something seems off in your drawing, here’s how to fix it:
- Does it look flat?
Add more contrast! Darker shadows and lighter highlights will fix it. - Does it look too “scribbly”?
Check if your strokes follow the right direction and shape of the fur. - Does it look muddy?
You might have over-blended. Try adding sharp details back in with a light pencil.
Congratulations, You’re Now a Fur-Master!
If you’ve made it this far, give yourself a pat on the back! Fur is one of the trickiest things to draw, but you now have the tools to master it.
Final Tips for Success
Practice with different types of animals—short fur, long fur, curly fur!
Experiment with different colors—fur is never just one shade!
Be patient! The best fur drawings are built up slowly and in layers.
Now go forth and create the fluffiest, most realistic fur possible! And remember: art is meant to be fun—so enjoy the process!