
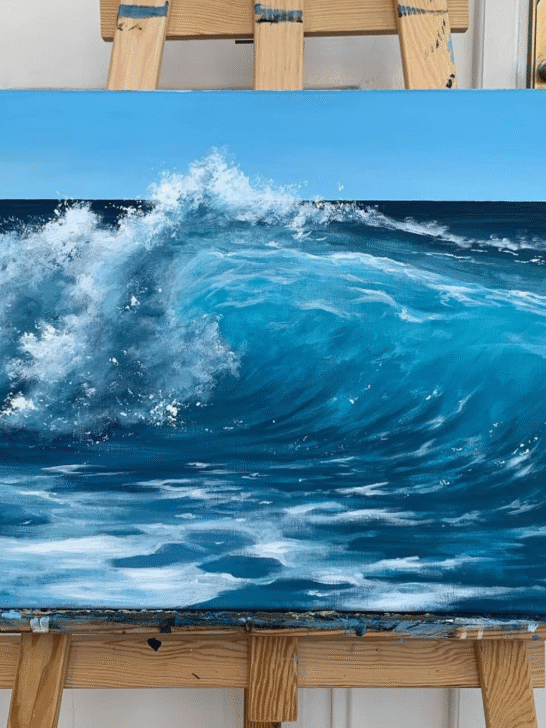
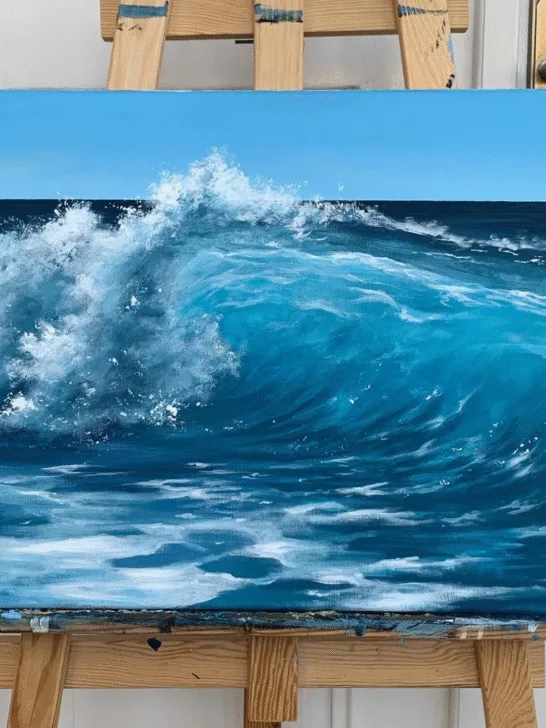
Painting water can seem intimidating — all those subtle waves, glimmers, and reflections — but once you break it down, it’s a surprisingly rewarding process. In this guide, we’ll walk you through how to paint realistic, sparkling water with acrylics, inspired by a beautiful project completed on a wood panel. Whether you’re a confident beginner or a more advanced artist, you’ll find real, actionable steps you can follow (plus plenty of encouragement to enjoy the process!).
Tools and Materials You’ll Need
Before you dive into painting, gather your materials:
- Acrylic paints (primary colors: red, yellow, blue, and white are enough — you’ll mix your own shades)
- Wood panel or canvas
- Craftamo bamboo brushes or any good-quality brushes (flats, filberts, and rounds)
- Reference photo of sparkling water (optional but highly recommended)
- Water container and palette
- Paper towels
- Optional: A spray bottle to keep paints moist and fluid
Tip: You don’t need the exact same paints or brushes used in the reference video. Use what you have and focus more on your technique than your tools.
Step-by-Step: How to Paint Water With Acrylics
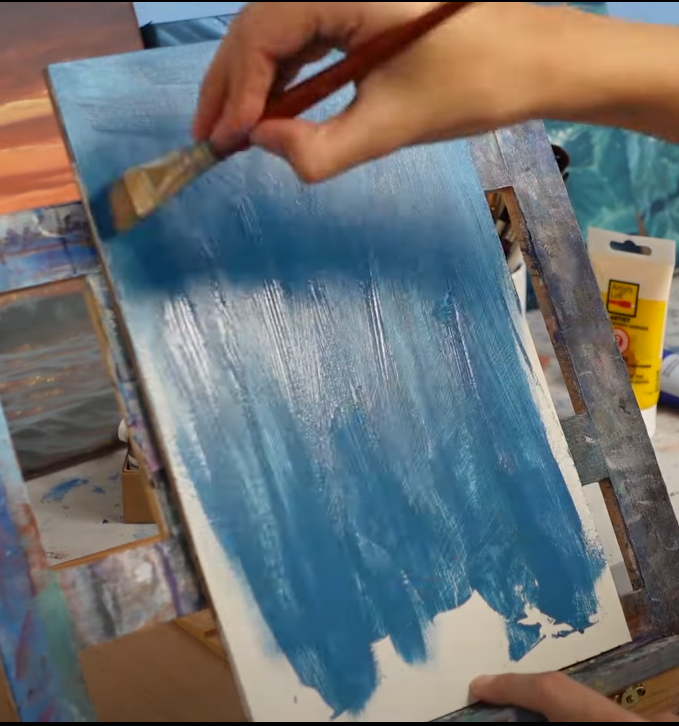
1. Lay Down a Neutral Base Color
Start by mixing a neutral blue — not too dark, not too light — and cover your whole canvas or wood panel. This background color gives the painting a cohesive feel and prevents white patches from showing through your transparent layers later.
Why it matters: Transparent paints layered over a base create a natural blending effect without forcing you to wet-blend acrylics, which can be tricky.

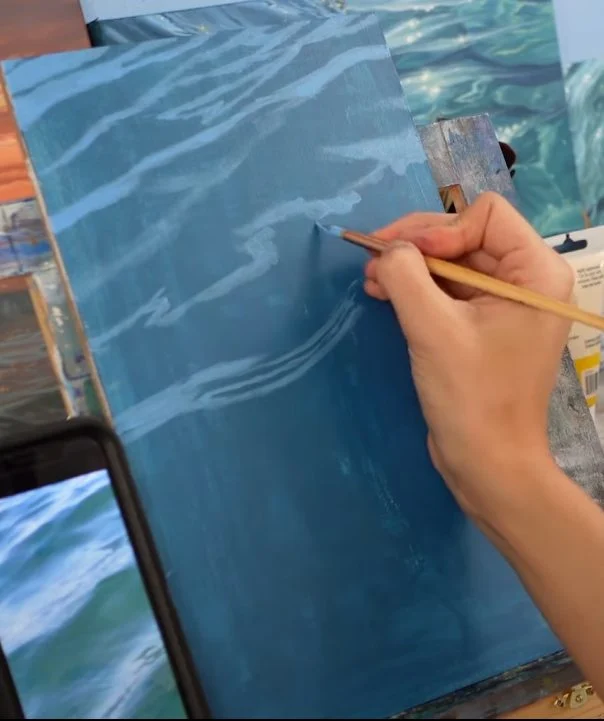
2. Sketch Out Your Highlights
Mix a lighter blue (but not your brightest highlight yet) and sketch the areas where the sunlight hits the water. Freehand if you’re comfortable, but using a grid or tracing system is completely fine too.
Focus on the big shapes of the highlights — the way they move across the water like little islands of light. It’s okay if it’s not perfect; you can easily paint over mistakes with acrylics!

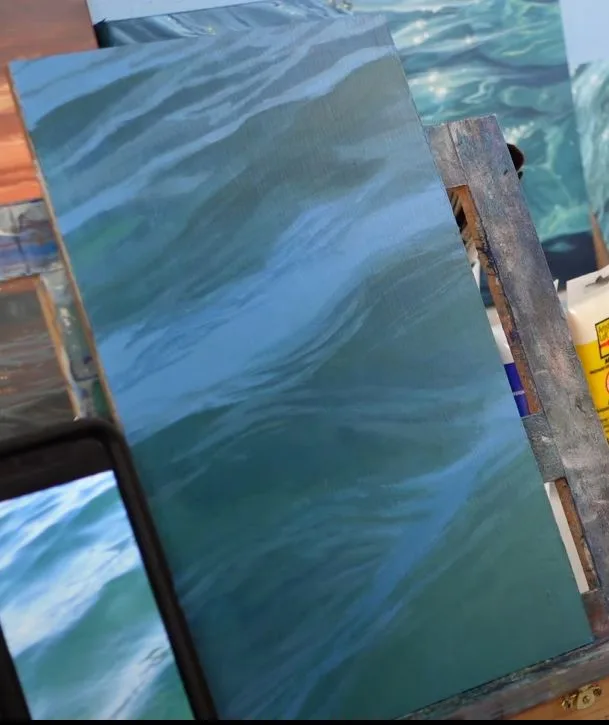
3. Block In the Shadows
Next, mix a greenish-blue color that matches the shadow areas in your reference photo. Fill in all the spaces around your highlights. Don’t stress about the color being exact — keep it slightly lighter or darker where needed to hint at depth and movement.


Tip: Keep adjusting the color as you work! Add a bit more blue or green to shift the tone naturally across the canvas.
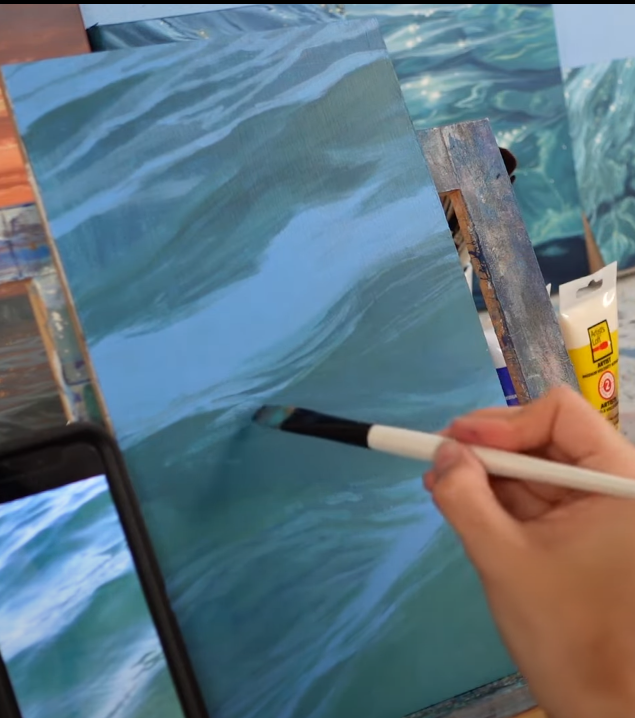
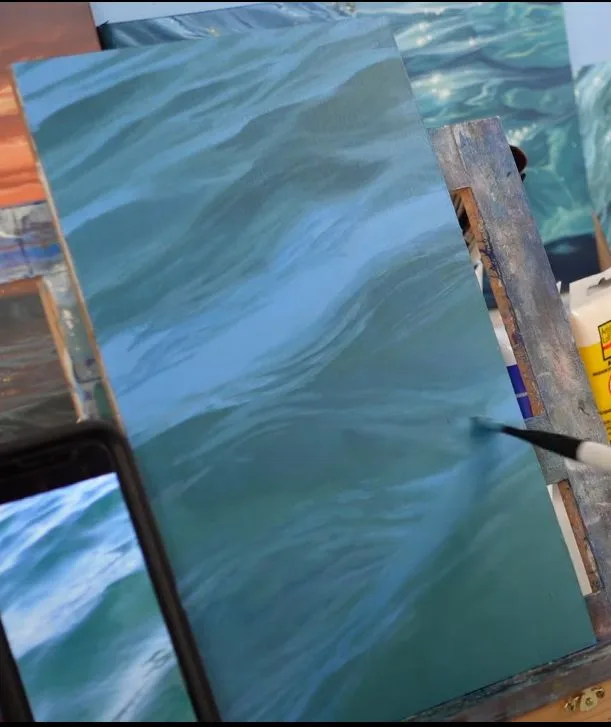
4. Pay Attention to Wave Shapes
The shape of the waves — the teardrops, streaks, and curves — is what makes your painting feel alive. Study your reference closely and replicate those organic, flowing shapes as best you can. This part is tricky, so be patient with yourself!

Remember: Capturing a single moment of moving water is hard. Give yourself grace as you learn.
5. Create Subtle Transitions
Where the shadows meet the highlights, soften the edges by mixing intermediate shades between your darks and lights. Use a flat brush and light, line-like strokes to blend. Not every line should be blended — contrast in some areas is key to realism!

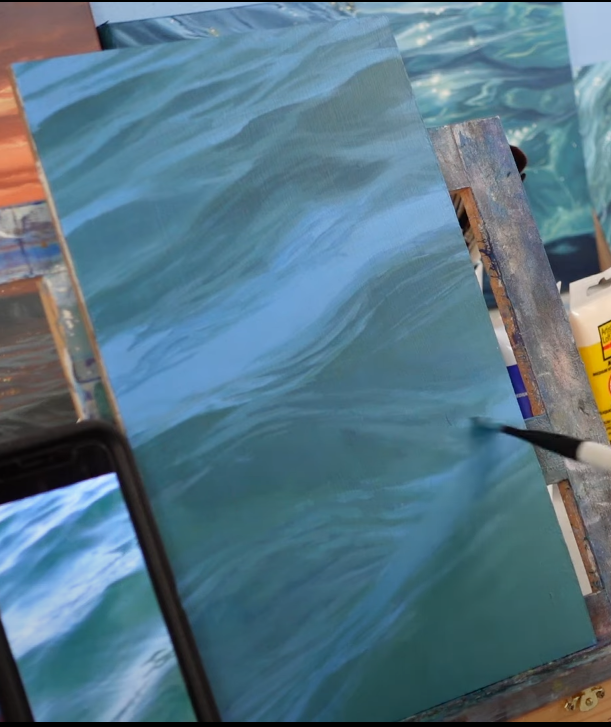
6. Build a Strong Foundation
At this point, your “foundation” — the main structure of light and shadow — should be solid. This is the hardest part. Once it’s set, everything else (details, sparkles, highlights) becomes much more fun.

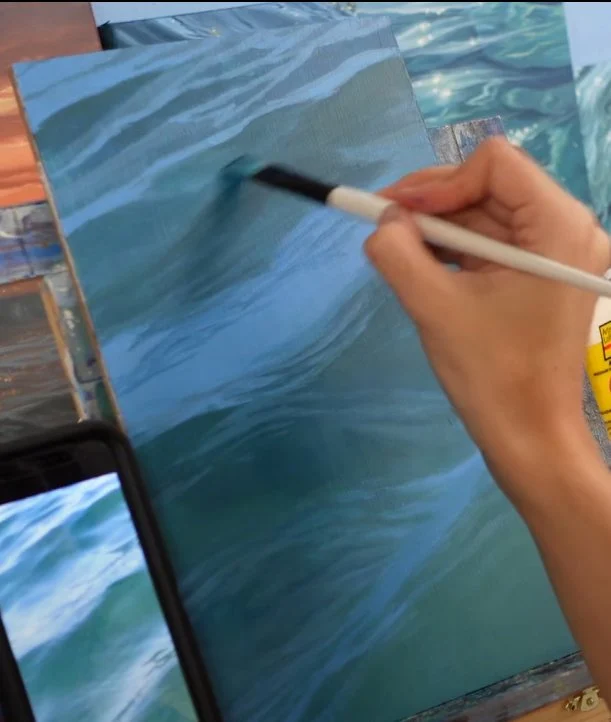
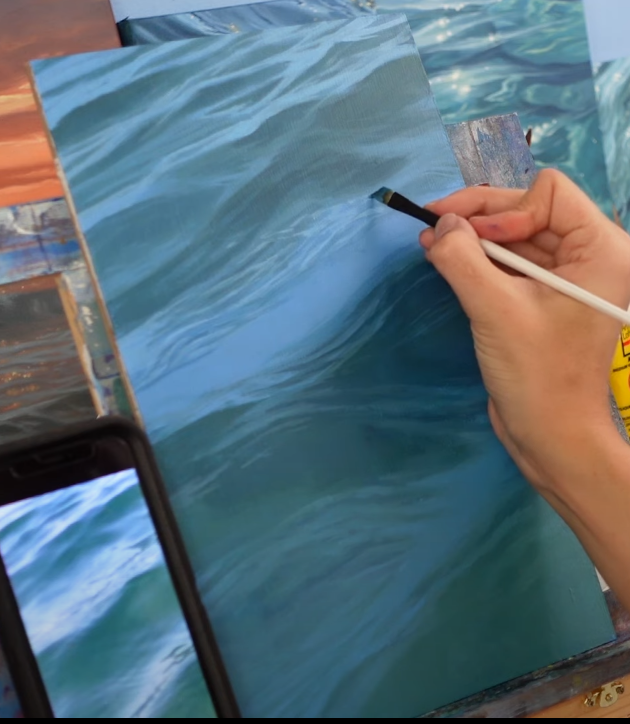
7. Add Midtone Details
Start layering midtones: mix colors that are just slightly lighter or darker than your surrounding areas and carefully add subtle waves, reflections, and shifts. Always look back at your reference to find where transitions happen.
Tip: Slight differences matter a lot when painting water — it’s all about subtle shifts!
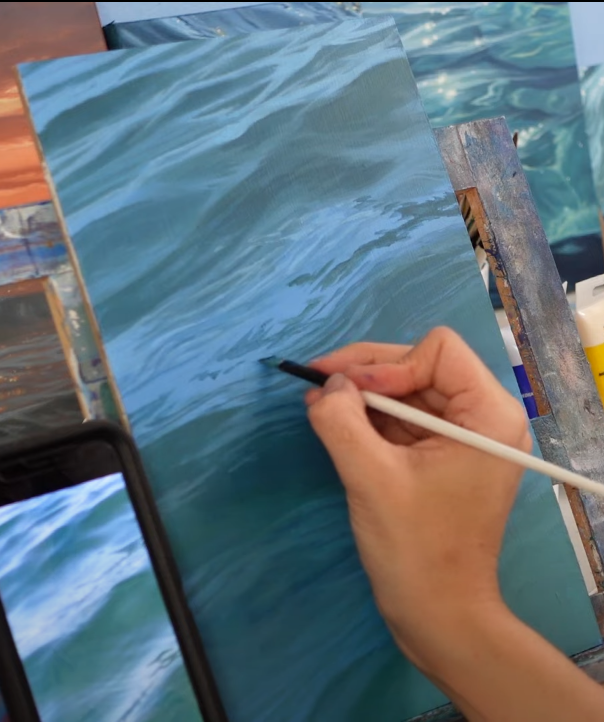
8. Boost the Highlights
Now it’s time to go brighter! Mix a lighter highlight shade and start refining the areas you mapped out earlier. Highlights on water behave like light on a mirror — they shift and curve with the surface.

Add these brighter highlights carefully, focusing on the brightest parts of your painting — but know you’ll go even brighter in the final stages.
9. Add Reflections
Mix a darker teal to represent reflected objects (like trees or distant waves) that appear on the water’s surface. Paint these over your lighter areas using freehand lines and wavy shapes. Reflections don’t need to look like perfect objects — they should feel distorted and soft.

10. Layer Final Bright Highlights
Once your painting is mostly dry, mix your brightest highlight yet — nearly white with a touch of blue — and paint fine, thin lines and streaks where the sun hits the water most intensely. This final touch makes your painting pop and gives it true dimension.

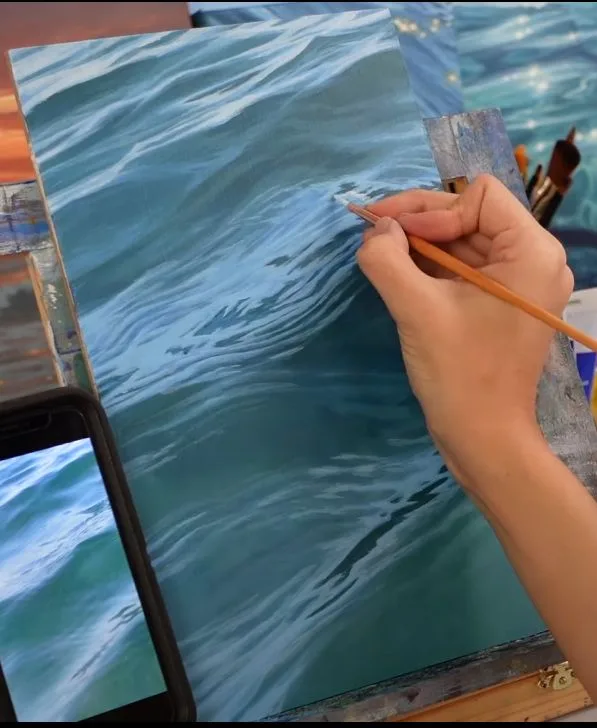
Note: Acrylics dry darker than they look when wet, so don’t be afraid to push your highlight brightness further than you think!
11. Add Sparkles for Magic
(Optional but fun!) Use a tiny brush or even your fingertip to add tiny dots and mini crosses for sparkles. Place them mainly on the highlights. Start with a warm yellow glow around each sparkle, then add a bright white dot or cross at the center.

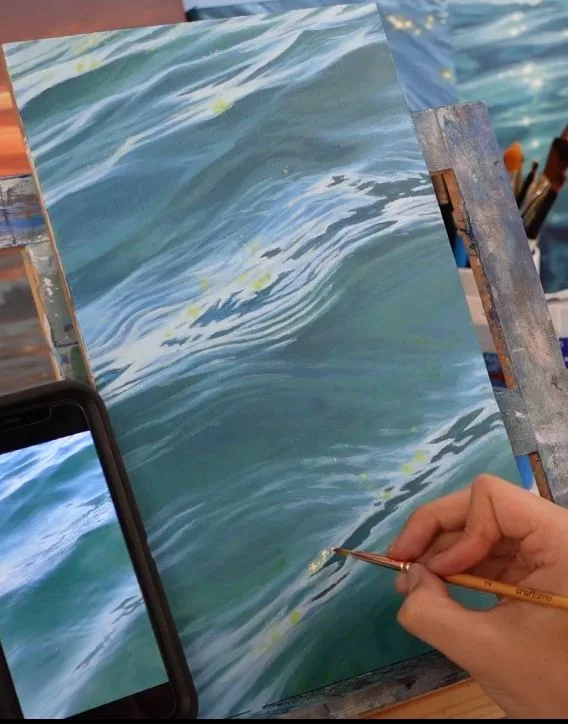
Pro Tip: Sparkles should mostly appear where the water is brightest — not randomly across the painting — to maintain realism.
You can also check out:
Best Oil Paint Sets for Beginners; Top Picks and Buying Guide
top tier Acrylic Paint Sets for Artists, top picks for Quality Pigment and Performance
A Beginners to Drawing Fur Like a Pro
Frequently Asked Questions
How to use acrylic paint with water?
Using water with acrylic paint can help you control the transparency and flow of your paint. To thin acrylics for subtle washes or light blending effects, simply add a small amount of clean water to your paint—start with just a few drops and mix well. Be careful not to add too much water (over 30% relative to the paint) as it can weaken the pigment and adhesion. For controlled layering and soft gradients, lightly watered-down acrylics are a great technique.
Can you water paint with acrylic?
Yes, you can! Acrylic paint can be thinned with water to create effects similar to watercolor, such as light washes and translucent layers. However, unlike watercolor, acrylics will dry permanently once the water evaporates. This allows you to build depth gradually without lifting or muddying previous layers. It’s perfect for painting subjects like water, skies, or delicate textures.
How to make painted water look realistic?
To make water look realistic in acrylic painting, focus on building layers of subtle color shifts, accurate wave shapes, and reflections. Start with a neutral base color, block in your highlights and shadows carefully, and gradually add midtones and transitions. Pay close attention to the organic movement of waves and the way light plays across the surface. Use small, varied strokes and soft blending between colors to mimic the complexity and fluidity of real water.
How do you make acrylic paint flow like water?
To make acrylic paint flow more easily, you can thin it with water or use an acrylic flow improver or medium. These additives extend drying time and allow the paint to glide smoothly over the surface without losing pigment strength. Lightly misting your canvas with water as you work can also help keep paints from drying too quickly, allowing for better blending and softer transitions—essential for creating fluid, natural-looking effects like water.
Final Thoughts
Painting water with acrylics is a journey of layers, subtle transitions, and patience. It’s easy to rush or get frustrated, but remember: every mistake is fixable with acrylics, and every painting is a step toward becoming better. Focus on the process, not perfection.
By following these steps, you’ll not only create a stunning, realistic water painting — you’ll also build skills that can apply to any acrylic project you take on in the future.
Now grab your brushes, trust yourself, and start painting your own sparkling masterpiece!