

Painting a sunset is one of the most rewarding projects for beginner artists. With just a few simple techniques and an understanding of color blending, you can create a vibrant, realistic sunset scene. Here’s a step-by-step beginner tutorial inspired by M. Stuart Paintings’ video.
Materials You Will Need
- Acrylic Paint Colors: Titanium White, Cadmium Yellow, Matte Orange, Matte Rose Pink, Carolean Blue, Cobalt Blue, Iris Purple, Sap Green, Burnt Umber, Matte Black
- Brushes: Large flat brush, fan brush, small detail brush
- Canvas or paper
- Optional: Painter’s tape for a clean horizon line, hairdryer for faster drying
Simple Steps to Follow on How to Paint a Sunset for Beginners
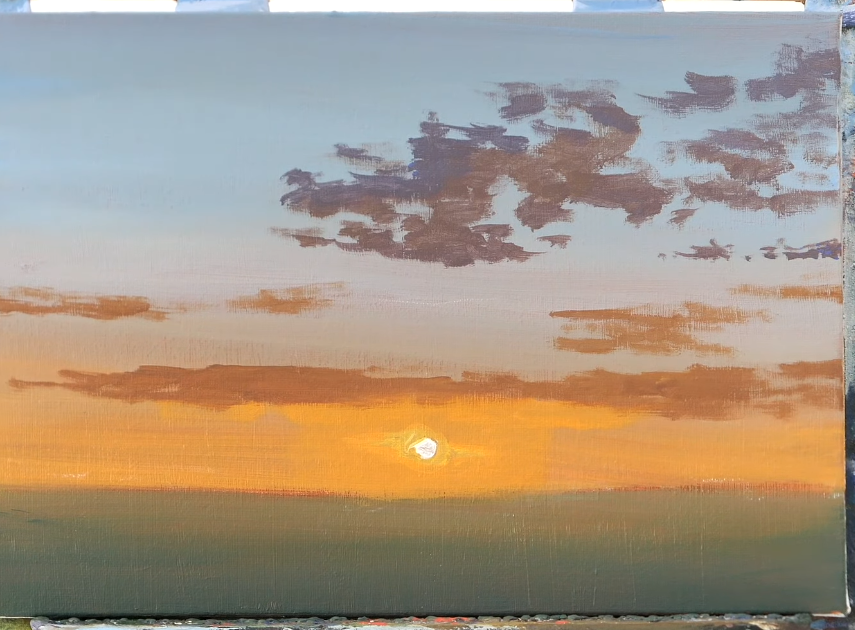
Step 1: Sketch a Simple Horizon
Lightly mark your horizon line low on the canvas. Place a small circle for the setting sun just above this line, slightly off-center.
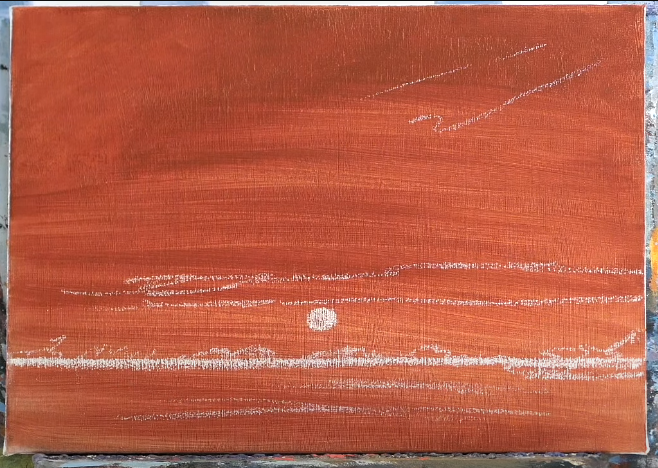
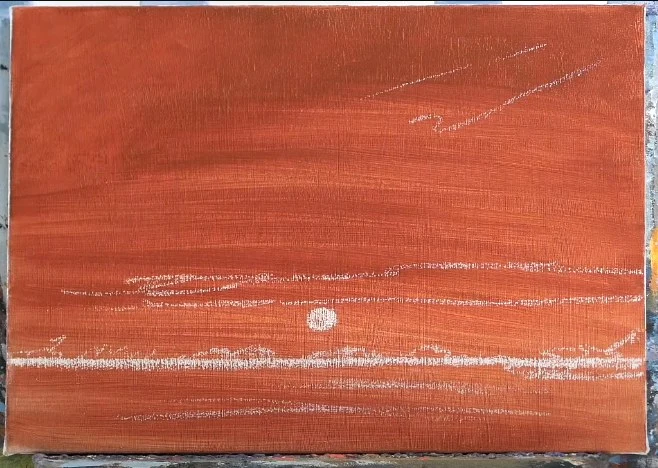
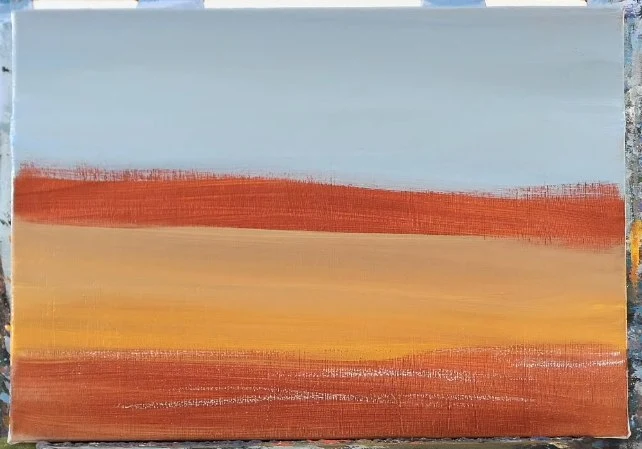
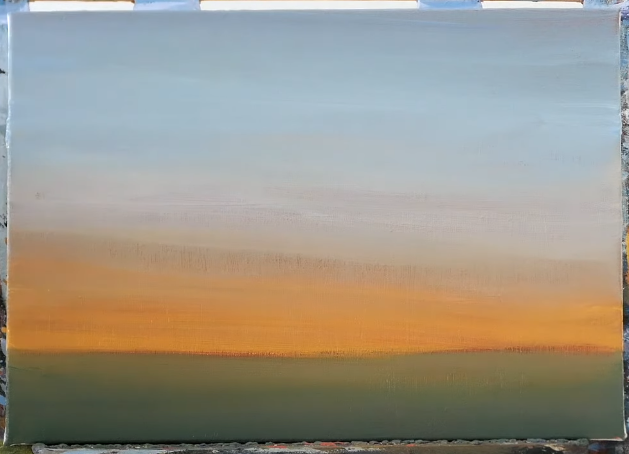
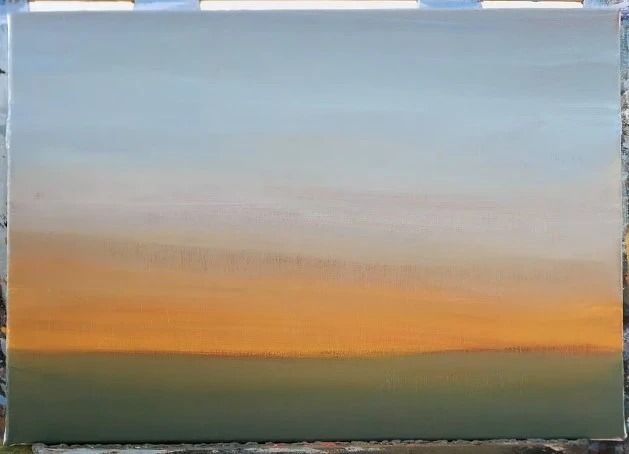
Step 2: Block In the Warm Sunset Glow
Using a big brush:
- Mix yellow, orange, and a tiny dot of black.
- Paint the area around the sun with this bright, warm tone.
- This represents the intense heat and brightness near the setting sun.

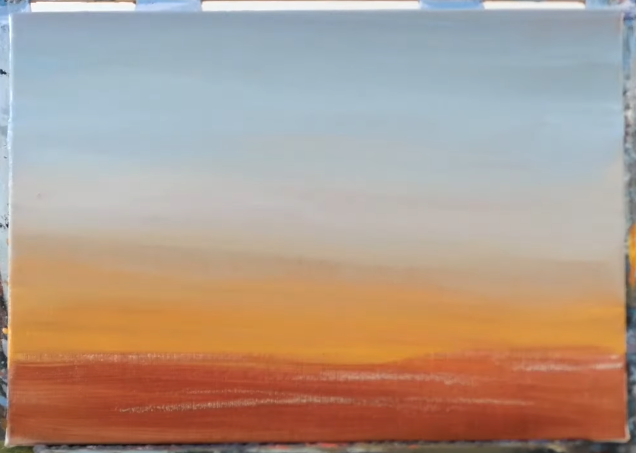
Step 3: Transition to Cooler Sky Colors
- As you move upward, blend in yellow, orange, purple, and white to create a softer, cooler pastel.
- Higher up, mix Carolean Blue and Cobalt Blue with lots of white to create a pastel sky blue.
- Keep the bottom warm and transition gradually to cooler blues as you go higher.

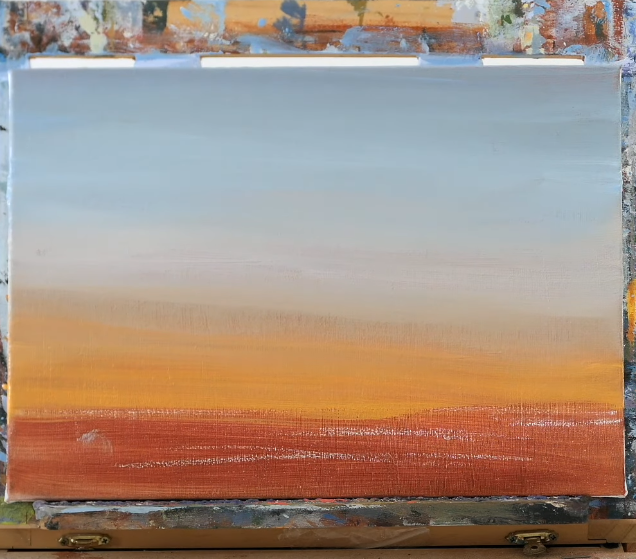
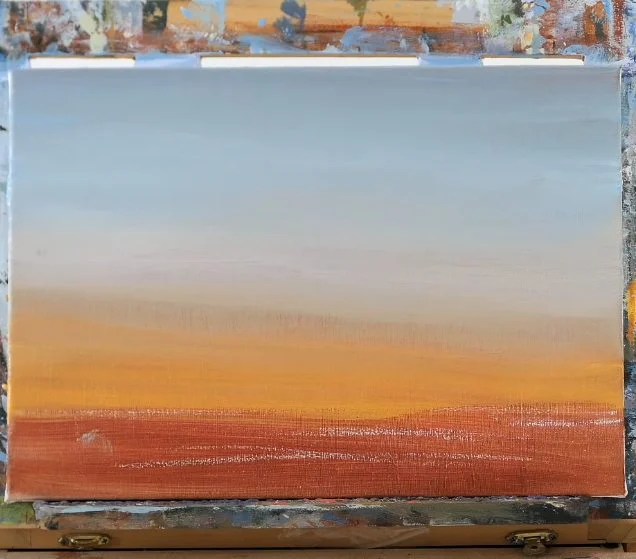
Step 4: Bridge the Hot and Cool Zones
- Mix yellow, purple, orange, and lots of white to create a soft lavender-gray.
- Use gentle X-shaped strokes to blend between the warm sunset and the cooler sky above, creating a smooth transition.

Step 5: Frame the Corners
- Darken the upper corners with a deeper blue (Carolean Blue + Cobalt Blue + less white) using light X strokes.
- This adds natural framing and depth to your painting.
Step 6: Block in the Ground
- Near the sun, use a warm green (Sap Green + Burnt Umber + a hint of Orange).
- As you move outwards, shift to cooler greens (Green + Blue + Brown) to darken the edges.
- Again, blend these tones with loose X-strokes.
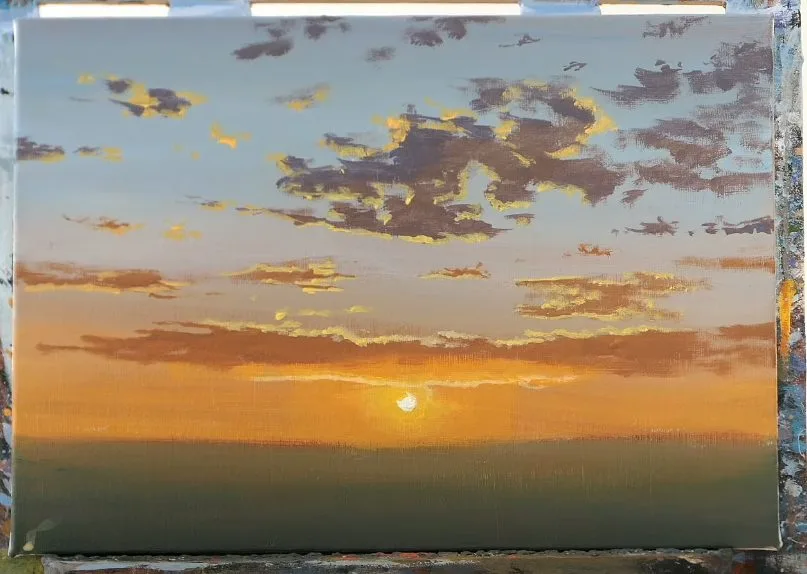
Step 7: Paint the Sun
- Use pure Titanium White to fill in the sun.
- Surround it with a Cadmium Yellow halo to emphasize its brightness.
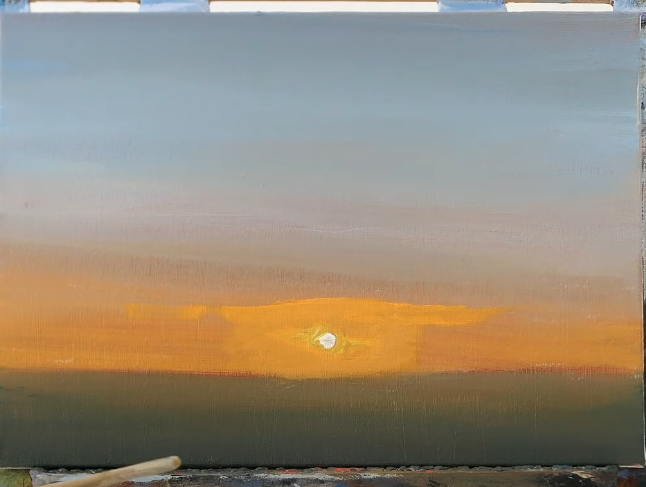
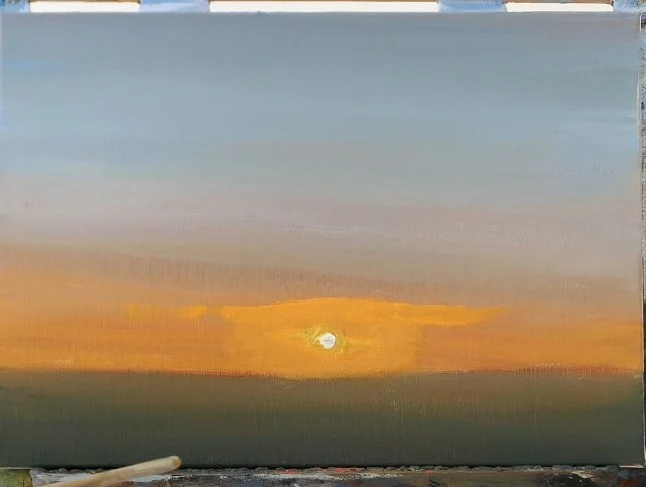
Step 8: Add Realistic Clouds
- Around the sun: Use orange and yellow to create warm, low-lying clouds with horizontal strokes.
- Higher up: Add purple and orange tones for cooler, angled clouds, hinting at the globe’s curvature.
- Fluff edges with a dry brush for softness.

Step 9: Create Cloud Highlights
- Use a tiny brush to outline the base of clouds closest to the sun with white + yellow.
- As you move outward, shift to peachy oranges to indicate less direct sunlight.
- Focus on highlighting just the bottom edges where sunlight would strike.

Step 10: Add a Distant Tree Line
- Tape off your horizon line.
- Mix purple and orange to create a muted brown for trees.
- With a fan brush, dab on small, uneven tree shapes near the sun.
- Darken trees farther from the sun by mixing in more blue and black to silhouette them.

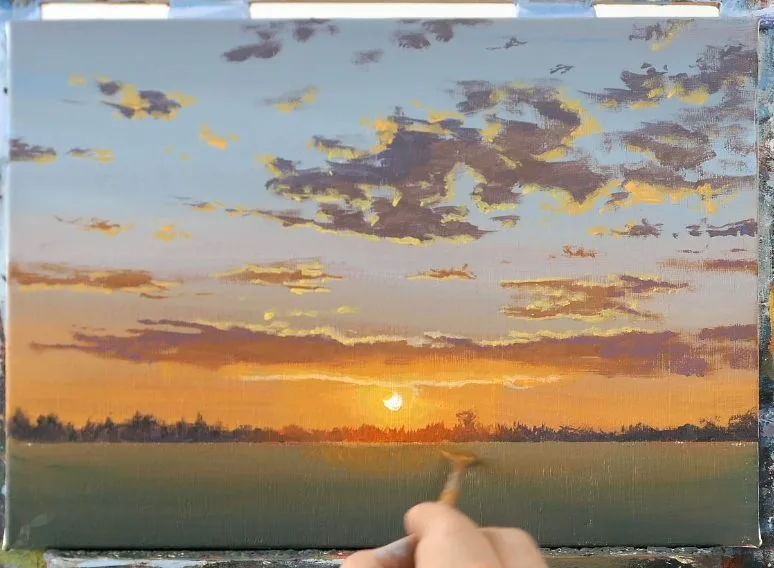
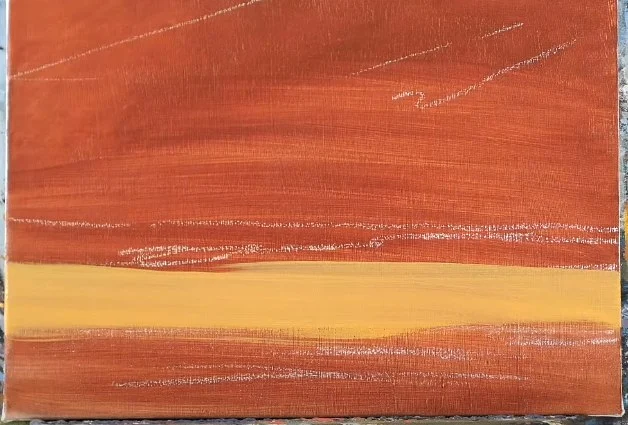
Step 11: Paint the Field
- Near the sun, use a light, bright green (Green + Orange + Yellow).
- Darken the grass towards the corners (Green + Blue + Brown).
- Use the fan brush vertically to create the texture of long grass.
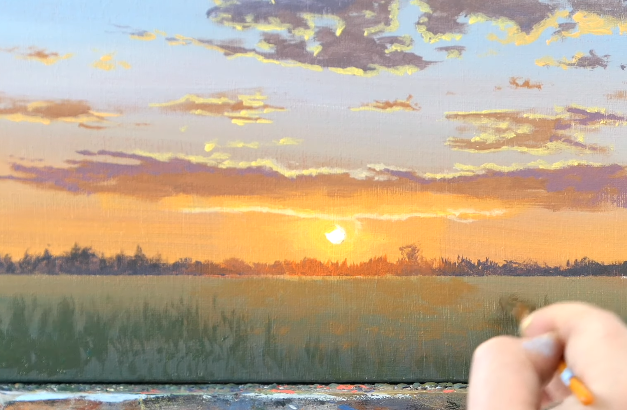

Step 12: Final Touches for Realism
- Brighten the area right under the sun with pure orange and yellow.
- Blend surrounding fields softly to avoid harsh transitions.
- Darken the corners with deeper greens and blues to naturally draw the eye toward the sun.

Tips for Success:
- Work fast while the paint is still wet for easier blending.
- Layer highlights once the painting dries to make colors pop.
- Use a dry brush technique for fluffier clouds.
- Frame the painting with darker edges for a dramatic look.
Also try and check out more beginner friendly painting and drawing tutorials:
Watercolor Horse Painting Tutorial in 9 Simple Steps plus Horse Painting Ideas
10 Easy Steps to Painting Clouds in Watercolor
How to Paint a Rose for Intermediate Artists
Easy Acrylic Beachscape Painting Tutorial for Beginners plus Painting Ideas
5 Essential Steps to Painting Realistic Trees for Stunning results
A Step-by-step Guide to Painting water in Acrylics
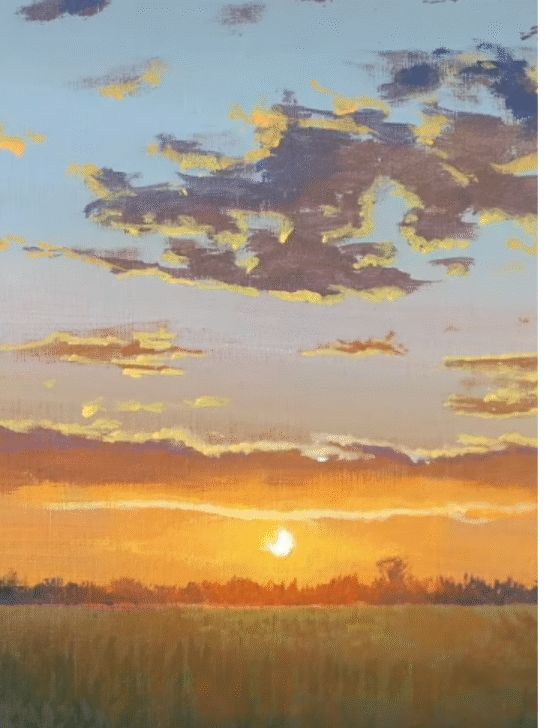
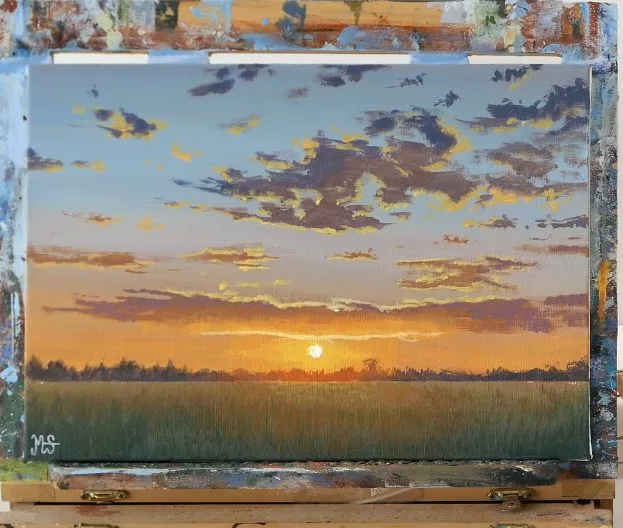
Final Result
By following these steps, you’ll create a sunset that transitions naturally from a bright, warm sun to a cooler evening sky, complete with soft clouds, a glowing tree line, and textured fields.
Remember: It’s not about painting perfect details — it’s about using colors and blending to create the illusion of realism.
Frequently Asked Questions
In what order do you paint sunset colors?
When painting a sunset, it’s best to start with the warmest colors closest to the sun, like bright yellows and oranges. As you move upward across the sky, gradually blend in cooler tones such as soft purples, pinks, and pastel blues. This natural transition mimics how real sunsets shift from intense heat near the horizon to cooler shades higher up in the sky.
What paint is best for sunsets?
Acrylic paint is often the best choice for painting sunsets, especially for beginners. It dries quickly, blends easily while wet, and allows for layering vibrant colors without long wait times. Look for quality student-grade or artist-grade acrylics to achieve richer, more luminous colors.
What color looks best in sunset?
Warm tones like cadmium yellow, bright orange, and rose pink are some of the most striking in a sunset. These colors create a sense of warmth and glow around the sun. When balanced with soft purples and pastel blues, they make the sunset feel both dramatic and natural.
What makes the prettiest sunsets?
The prettiest sunsets come from strong contrasts between warm and cool colors, smooth blending across the sky, and well-placed highlights and shadows in the clouds. Using softer pastel tones near the horizon and deeper blues and purples toward the top gives the sunset a realistic depth and makes the overall scene feel vibrant and alive.