
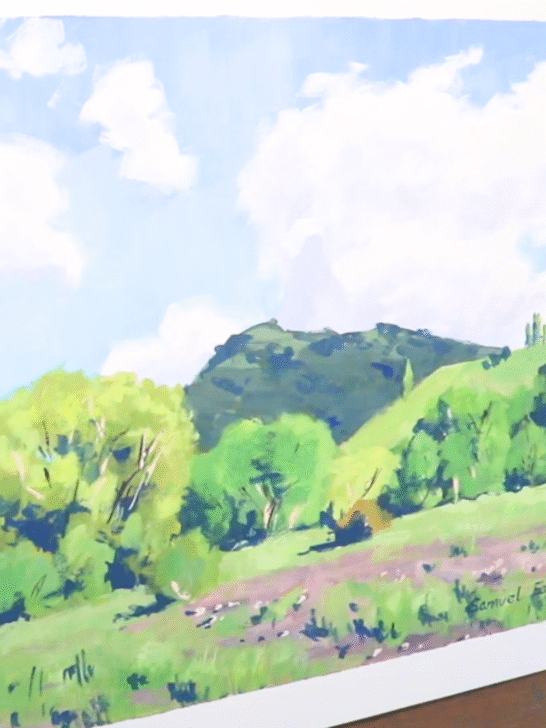
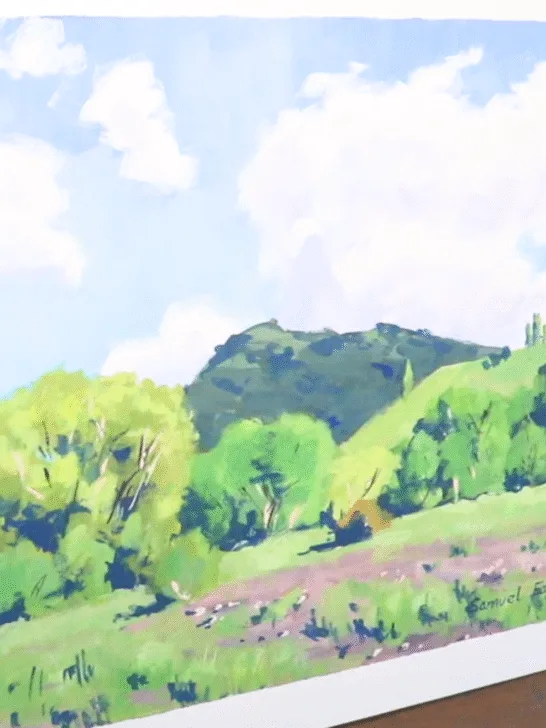
If you’ve ever admired the rich, velvety look of gouache landscapes and wondered how to achieve that effect yourself, this tutorial is for you. Inspired by artist Sam’s landscape demo, we’ll walk you through the key steps he used—simplified for beginners. Whether you’re transitioning from watercolors or oils, or you’re entirely new to gouache, these steps will help learn how to paint a landscape using gouache confidently.
What You’ll Need:
- Gouache paints: Titanium White, Burnt Sienna, Yellow Ochre, Lemon Yellow, Vermilion, Crimson, Ultramarine Blue, Viridian
- Watercolor paper (10×12 inches recommended)
- Masking tape
- Brushes: Flat synthetic brushes (#18 and #12), Egbert brush (#2), round brush for details
- Palette and water container
How to Paint a Landscape Using Gouache in 10 Easy Steps
Step 1: Tape Down Your Paper and Lightly Sketch
Start by securing your watercolor paper to a board or easel using masking tape. Lightly sketch your composition with an HB pencil. You don’t need details—just enough to guide your shapes.
Step 2: Block in Dark Values
Begin by painting the shadows first using a thin wash. Sam recommends a mix of ultramarine blue, burnt sienna, a touch of crimson, and titanium white. This helps you define structure early and sets the tone for your color values.
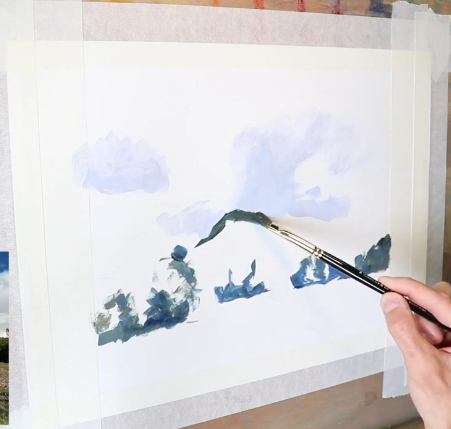

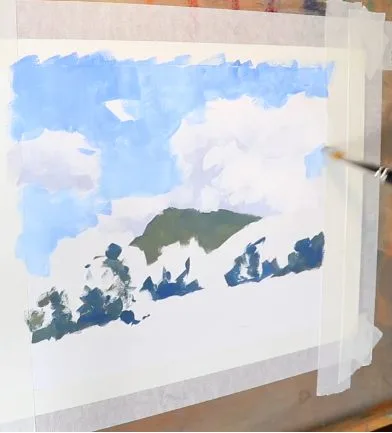
Step 3: Lay Down Background Elements
Paint the sky and distant hills. For the sky, mix ultramarine blue, titanium white, and a hint of Viridian. For the hills, use ultramarine blue, yellow ochre, lemon yellow, and white. Work from the background forward, keeping values lighter and less saturated as they recede.

Step 4: Mix and Apply Tree Shadows
To paint willow tree shadows, blend ultramarine blue with yellow ochre. Later, you can deepen these shadows by layering thicker paint. Remember: Gouache allows you to layer light over dark and vice versa.

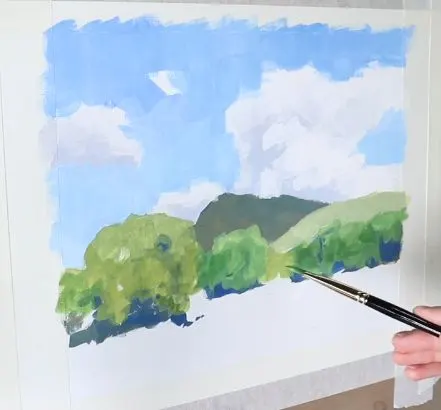
Step 5: Create Greens for Foliage and Grass
Use yellow ochre, lemon yellow, ultramarine blue, and white to build various green tones. Adjust by adding:
- Vermilion to desaturate (for a more natural green)
- Viridian to intensify the saturation
Use more white for grassy areas, and remember that grass is often a lighter value than trees.

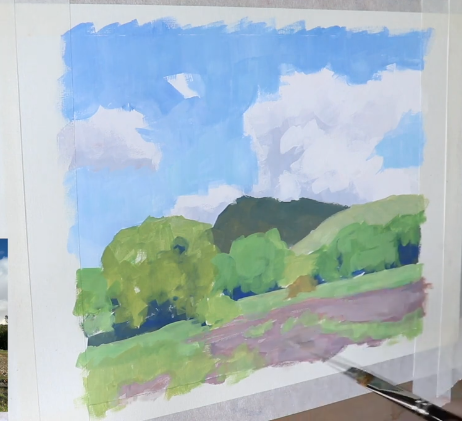
Step 6: Add Midtones and Textures
Start layering thicker gouache to add body and texture. Use the Egbert brush for expressive tree foliage and brush marks that follow natural forms. Add midtones to build volume, especially in tree canopies.

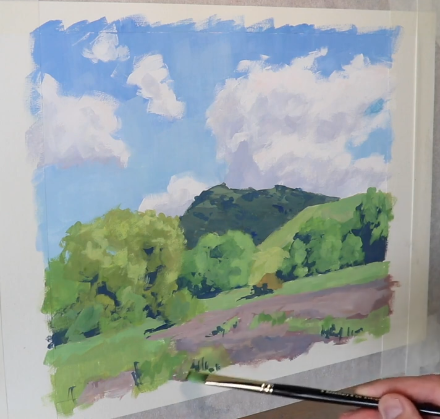
Step 7: Emphasize Dark Accents
Deepen the darkest parts of tree interiors with almost pure pigment. Use the Egbert or a fine brush to create texture and form. These occlusion shadows help your trees look three-dimensional.


Step 8: Introduce Highlights Last
Use your lightest values (white + a touch of lemon yellow or ochre) sparingly at the end to highlight sunlit areas, especially the tops of tree canopies. This brings your landscape to life.

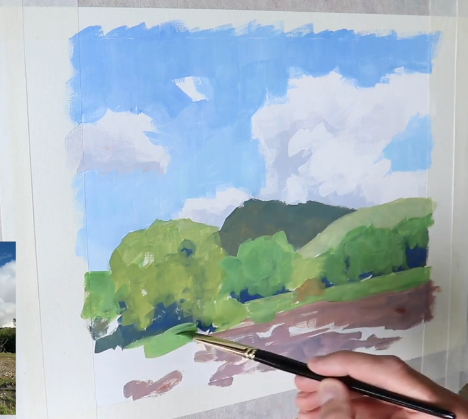
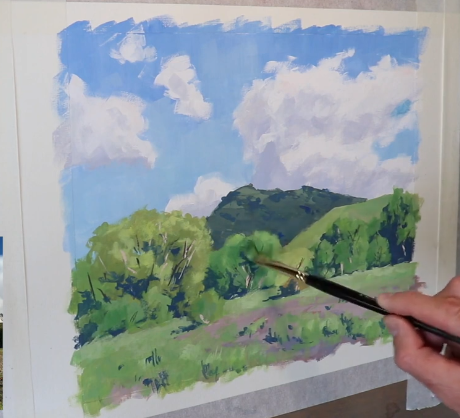
Step 9: Detail the Foreground
Paint grasses and low-lying plants using vertical strokes with a flat brush. Add minor details like bushes or tree trunks using a round or rigger brush. For trunks, use ultramarine blue and burnt sienna for near-black, and mix white, ochre, and burnt sienna for lighter branches.

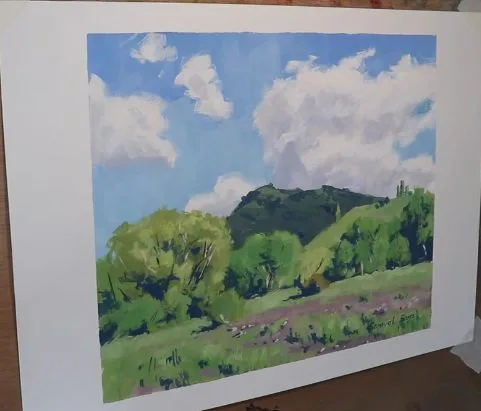
Step 10: Final Touches and Tape Removal
Once the painting is dry, add final highlights and adjust values where needed. Gently remove the masking tape to reveal clean edges. To prevent tearing, press the tape onto another surface first to reduce its stickiness.

Why Gouache Works So Well
Gouache offers the beauty of oil paint and the convenience of watercolor. It dries fast, is easy to clean up, and allows layering and corrections. It’s ideal for both beginners and seasoned painters wanting portability and vivid results.
Also try checking out:
Discover Gouache Painting Ideas for Beginners
How to Paint Leaves Using Watercolors
How to Mix Skin Tones In Acrylics
Frequently Asked Questions
What is the weakness of gouache painting?
One of the main weaknesses of gouache is its reactivatability—once dry, it can be lifted or muddied by water or new layers. This makes it harder to preserve sharp details and can limit layering unless applied carefully.
What should you not do with gouache?
Avoid using too much water, as it can make the paint too transparent or cause streaks. Also, don’t varnish gouache like acrylic or oil—it’s water-soluble and needs to be protected under glass rather than with a topcoat.
How do I start painting with gouache?
Start by choosing a limited palette, good-quality watercolor paper, and synthetic brushes. Lightly sketch your scene, block in dark values, and build up from background to foreground, layering thicker paint as you go.
Do professional artists use gouache?
Yes, many professional artists use gouache for its vibrant color, versatility, and matte finish. It’s especially popular in illustration, design, and plein air painting due to its quick drying time and easy clean-up.