


Halloween doesn’t have to be expensive. With just paper, scissors, glue, and a little imagination, you can conjure up bats, black cats, haunted houses, and all the spooky icons of October 31. Paper crafts have been a part of Halloween celebrations for over a century—classrooms and community halls once filled with hand-cut silhouettes, paper masks, and pumpkin cutouts long before store-bought decorations existed.
This list of 10 easy Halloween crafts with paper is drawn from Randel McGee’s Paper Crafts for Halloween^1 and Jean Eick’s Halloween Crafts^2, both of which celebrate simple, do-it-yourself traditions. Each craft is beginner-friendly, kid-approved, and can be completed in under an hour.
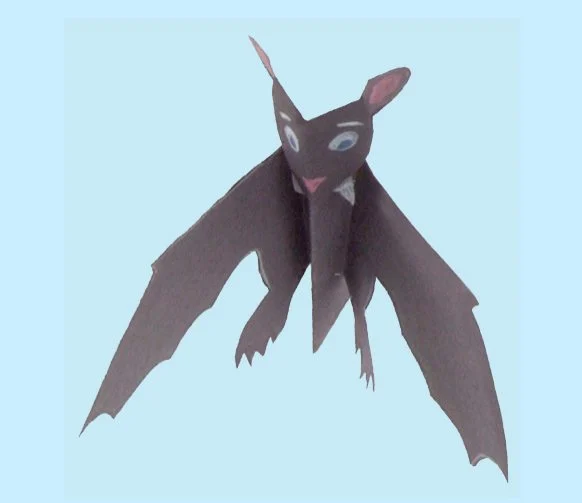
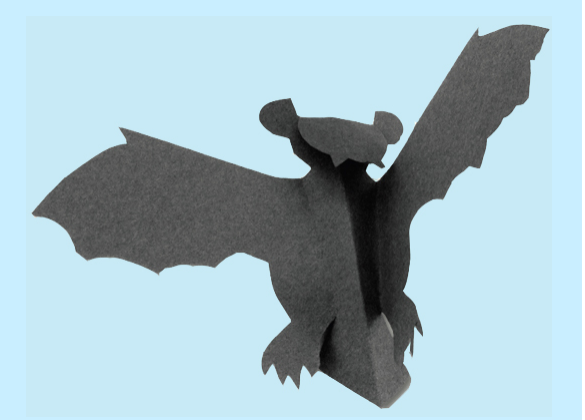
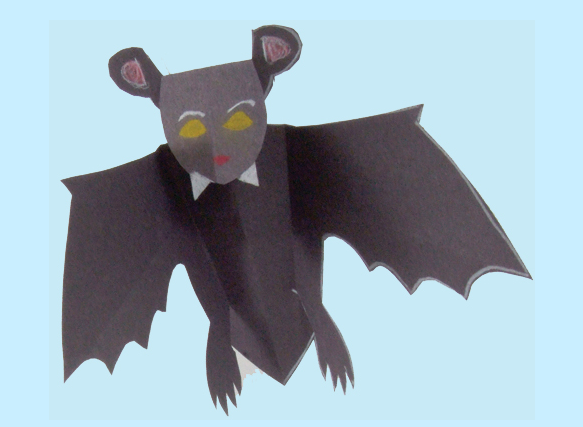
1. Flying Paper Bats

What you need:
- Black construction paper
- Scissors
- Crayons or white chalk (optional)
- String and tape
Steps:
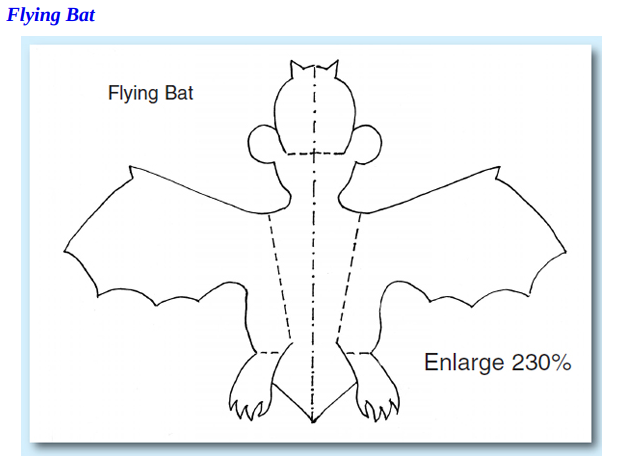
- Trace or draw a bat silhouette on black paper.
- Cut it out, fold along the body to give the wings dimension.
- Decorate the wings with white chalk for a “moonlit” effect.
- Tape string to the back and hang from the ceiling or window.

Cultural note: Bats became tied to Halloween because Samhain bonfires in Celtic Europe drew insects—and with them, bats swooping through the firelight^1. They were soon linked to witches and spirits.
Color tip: To avoid a flat, black cutout, highlight edges with purple chalk or silver paint. This adds depth and gives your bat a glow, like it’s flying through twilight.
2. Haunted House with Ghosts
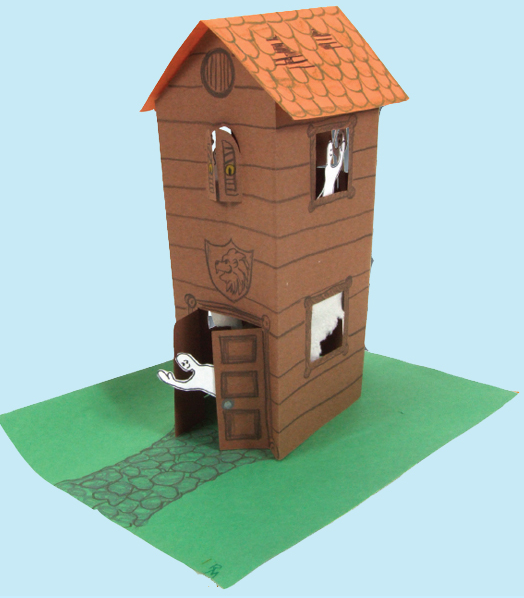
What you need:
- Black construction paper
- White paper (for ghosts)
- Scissors, crayons, and tape
Steps:
- Fold a large sheet of black construction paper in half and sketch a house outline with windows.
- Cut it out, leaving the windows open.
- On white paper, draw small ghost figures and cut them out.
- Tape the ghosts inside the windows.
- Add shutters, doors, or brick details with crayons.
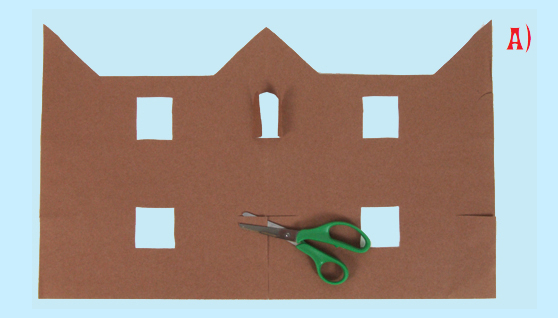
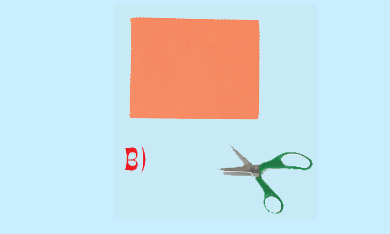
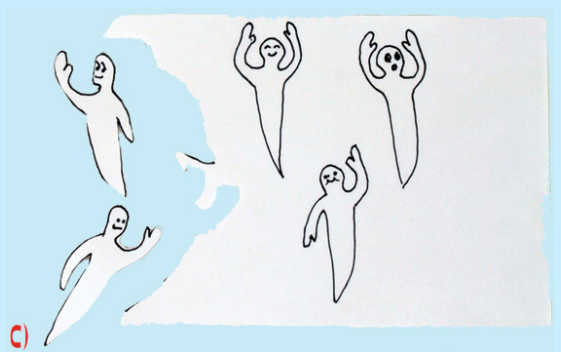
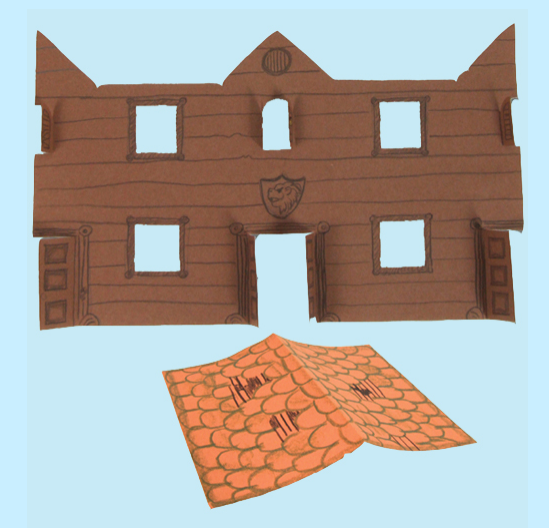
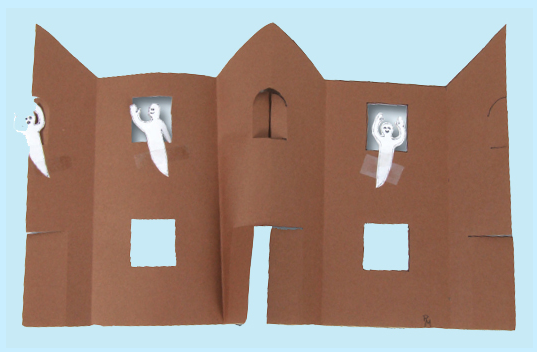
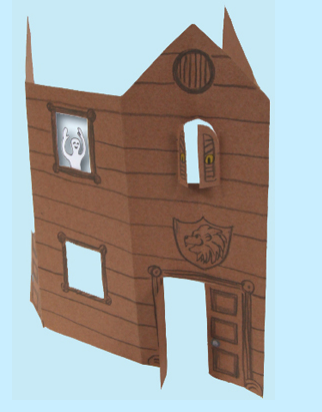
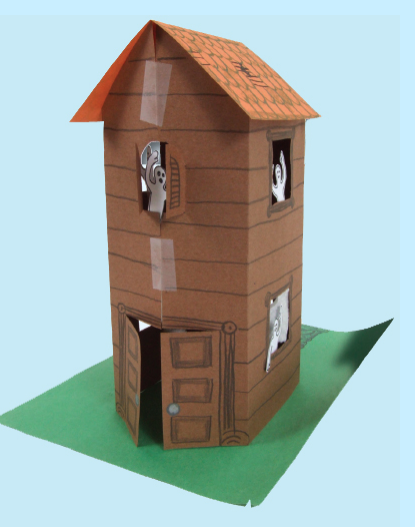
Cultural note: Since ancient times, ruined houses have been tied to spirits of the dead. Haunted houses became a standard Halloween image as the holiday spread to America^1.
Color tip: Try layering a sheet of yellow or orange paper behind the house to create a “lit from within” effect—perfect for a spooky but cozy vibe.
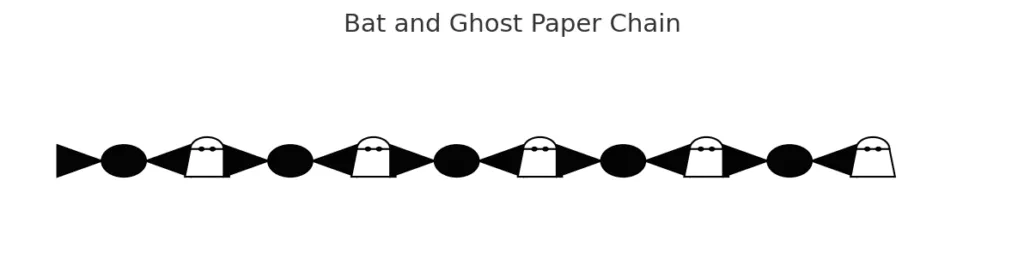
3. Bat and Ghost Paper Chains

What you need:
- Black and white paper
- Scissors, pencil, crayons
Steps:
- Draw a bat shape on folded black paper and a ghost shape on folded white paper.
- Cut them out, making sure to leave a little edge at the fold so the shapes remain connected.
- Unfold to reveal a chain.
- Alternate bats and ghosts to create a garland.
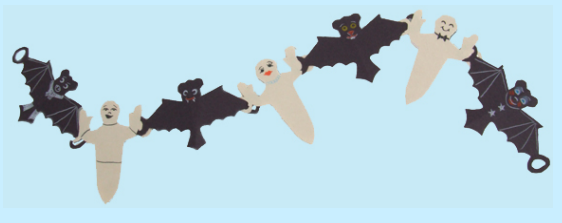
Cultural note: Chains of cutouts were a staple in 20th-century classrooms, combining easy repetition with dramatic visual effect^1.
Color tip: For a modern touch, add purple or green paper chains in between—the classic Halloween color triad of black, orange, and purple gives instant seasonal atmosphere.
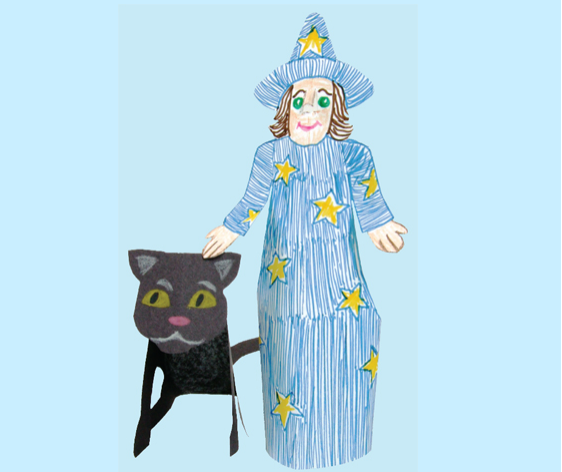
4. Standing Little Witch
What you need:
- White card stock
- Crayons, markers
- Scissors, tape
Steps:
- Fold cardstock lengthwise.
- Transfer a witch pattern along the fold so it can stand upright.
- Cut it out and decorate with markers—pointy hat, broomstick, striped stockings.
- Tape the skirt to form a base so it stands on its own.
Cultural note: Witches, once seen as wise women, became demonized in folklore and associated with Halloween bonfires^1. Today, they’re a playful icon of the holiday.
Color tip: Mix ultramarine blue with alizarin crimson to create a velvety purple for her hat and cloak. It avoids the flatness of plain black while still looking witchy.
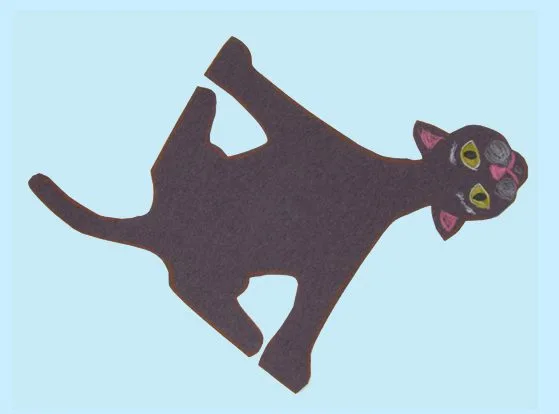
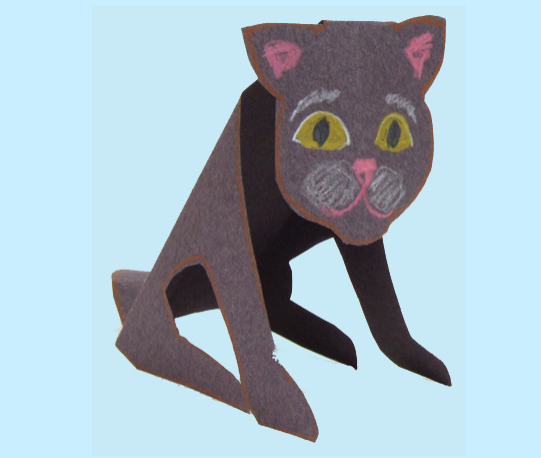
5. Sitting Black Cat

What you need:
- Black construction paper
- Chalk or colored pencils
- Scissors
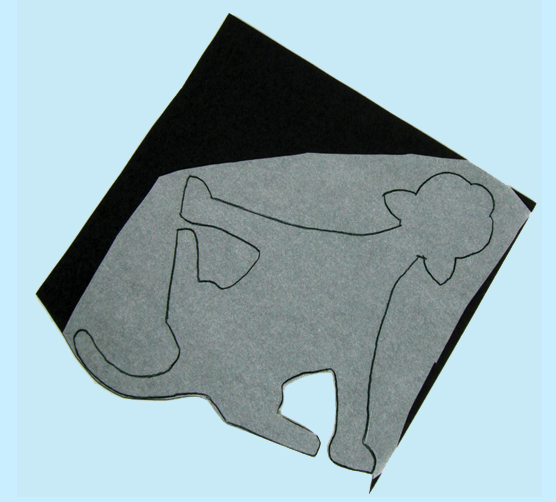
Steps:
- Trace a cat silhouette and cut it out.
- Fold along dotted lines to make it “sit.”
- Add glowing yellow eyes with crayons.
- Use white chalk to give subtle highlights to fur.
Cultural note: Black cats became witch companions in medieval lore. In the U.S., they’re now among the most popular Halloween motifs^1.
Color tip: To avoid a silhouette disappearing into dark backgrounds, outline edges with a soft gray or purple pencil.
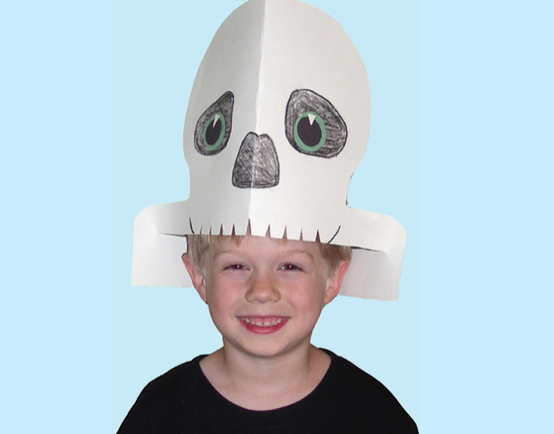
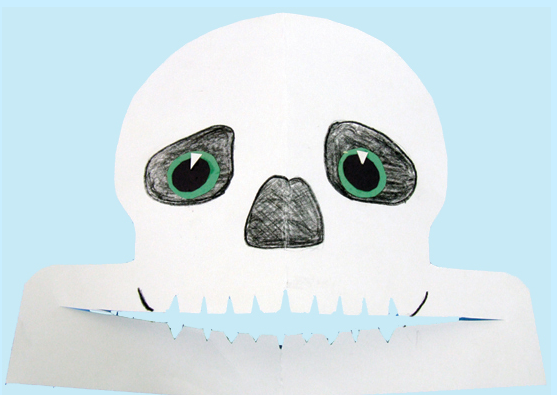
6. Skull Headdress
What you need:
- White poster board
- Scissors, crayons or markers
- String
Steps:
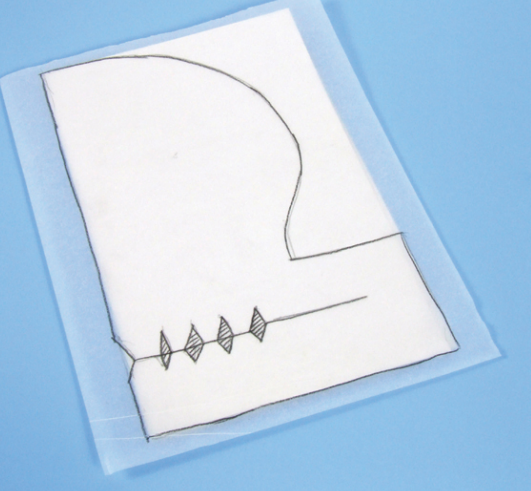
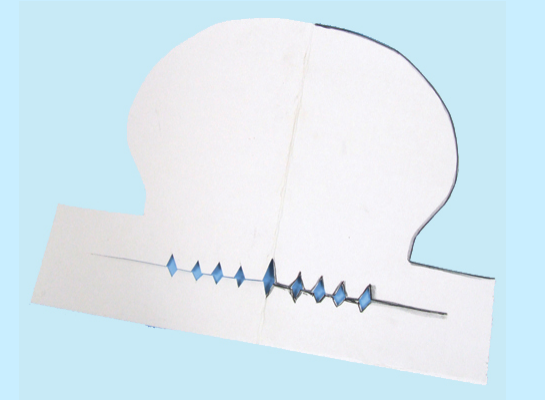
- Fold poster board in half and draw a skull.
- Cut it out, making sure to leave enough space for the headband strip.
- Decorate with black marker for eyes, nose, and teeth.
- Tape or staple to fit around your head.
Cultural note: Skull masks recall ancient traditions of disguising oneself from spirits during Samhain^1. They also echo Día de los Muertos skull imagery.
Color tip: Add colorful designs (flowers, swirls) to mimic sugar skulls for a festive twist.
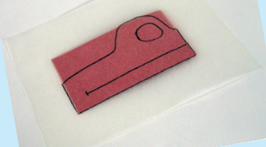
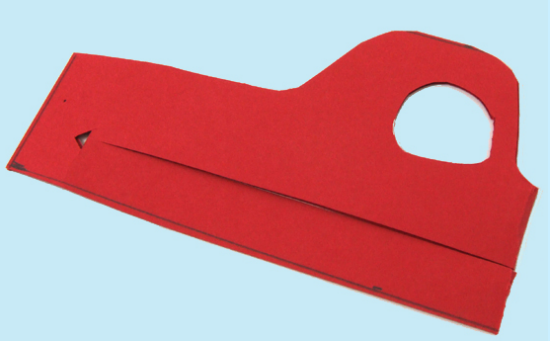
7. Goofy Halloween Goggles
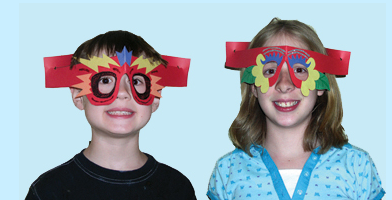
What you need:
- Poster board
- Scissors, glue, glitter, markers
- Elastic band or ribbon
Steps:
- Cut a simple goggle frame with eye holes.
- Decorate with feathers, glitter, and bright colors.
- Attach elastic to wear.
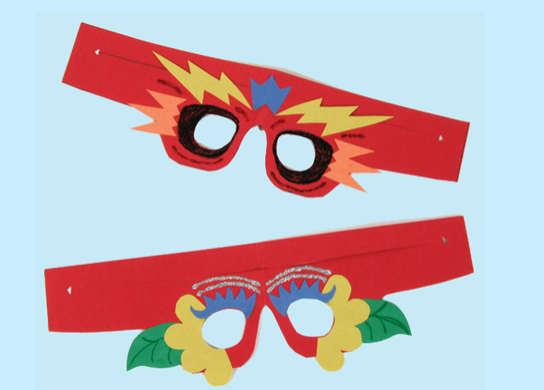
Cultural note: Halloween in early 20th-century America was about homemade costumes. McGee recalls crafting disguises like these goggles as part of neighborhood celebrations^1.
Color tip: Mix magenta with white to create bright pinks for silly decorations—an antidote to the darker Halloween palette.
8. Paper Pumpkin Cutouts
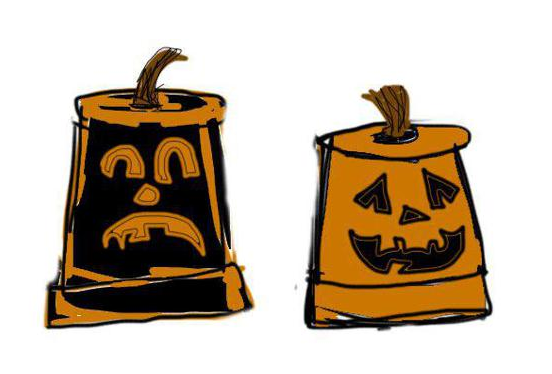
What you need:
- Orange, black, and brown construction paper
- Pencil, scissors, glue
Steps:
- Trace circles on orange paper and cut out.
- Add black paper cutouts for eyes, nose, and mouth.
- Glue a brown stem on top.
- String several together for a garland.
Cultural note: The jack-o’-lantern tradition comes from Irish immigrants carving turnips before pumpkins were available in America^1.
Color tip: To make a richer pumpkin orange, mix cadmium red + cadmium yellow with a touch of burnt sienna.
More Kids crafts
9. Halloween Cards and Envelopes
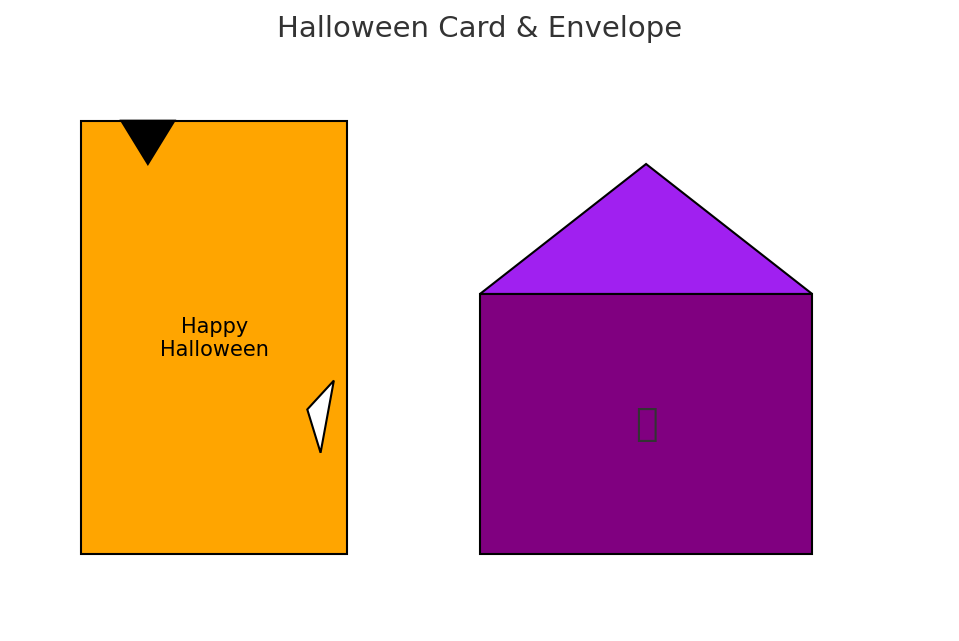
What you need:
- Construction paper in assorted colors^2
- Glue, glitter, markers, buttons, ribbons
Steps:
- Fold paper into card shapes.
- Decorate with spooky motifs—bats, ghosts, cobwebs.
- Make custom envelopes from construction paper or old wrapping paper.
Cultural note: Handmade cards carry forward the early 20th-century tradition of sending Halloween greetings. Vintage postcards often featured witches, pumpkins, and black cats.
Color tip: Try pairing orange cards with purple envelopes—complementary contrasts make them pop.
10. Paper Plate Ghosts & Monsters
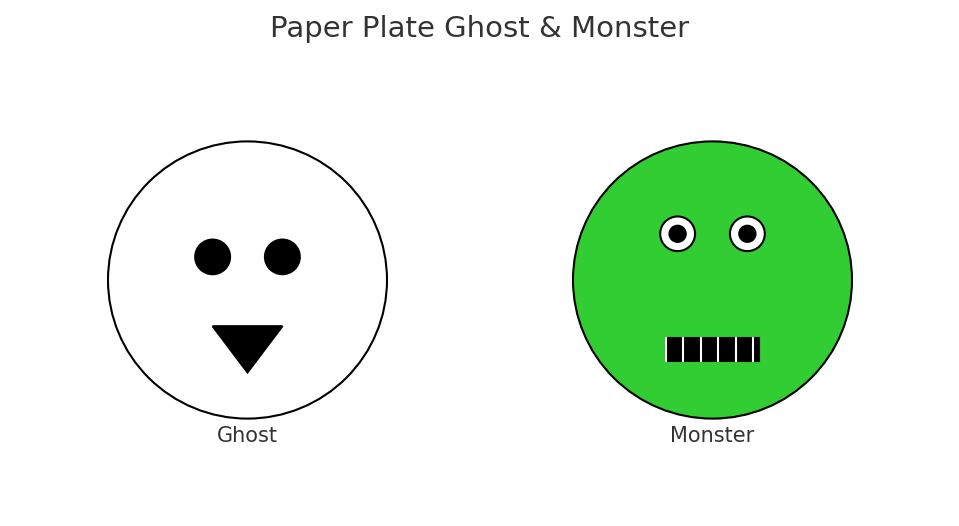
What you need:
- Paper plates
- Paint, markers, yarn, googly eyes
Steps:
- Paint plates white for ghosts, green for monsters.
- Glue yarn hair, add eyes, cut out mouths.
- Tape a stick to the bottom for a mask handle.
Cultural note: Jean Eick included paper masks in her 2011 collection as easy, playful crafts for parties^2.
Color tip: For Frankenstein green, mix phthalo blue with cadmium yellow, then mute with a touch of red.
Conclusion
From swooping bats to haunted houses, these crafts prove that Halloween magic can come from the simplest material: paper. They connect us to traditions stretching back centuries—Samhain bonfires, Irish jack-o’-lanterns, Victorian greeting cards—while giving kids and adults a chance to create together.
So grab some construction paper and scissors. Whether you’re hanging ghost chains across the ceiling, painting pumpkin cutouts for the fridge, or making a skull headdress for your party, these projects are proof that Halloween doesn’t need to come from a store. The most haunting decorations are the ones you make yourself.
References
- McGee, R. (2009). Paper Crafts for Halloween. Enslow Publishers.
- Eick, J. (2011). Halloween Crafts. The Child’s World.